

With the help of the filter option, you can filter results according to specific criteria. This will make it easier to find the right cow(s) or medicines, etc. It can also help you analyze more quickly by filtering according to the right group.
What is the result?
Using the filter option makes it easier to carry out analyses based on the criteria you select. In addition, it is also possible to search for specific items more quickly and easily. Looking up a medicine or a sire using the filter option saves a lot of time because you do not have to scroll through the entire list. If you want a select group of cows, just set the right criteria in the filter option to obtain a shorter list of the cows meeting the criteria you have set. You can search, for example, for all open cows that are longer than 150 days in lactation.
How do you set the filter option?
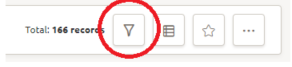
Step 1: Find the filter option in the upper right-hand corner of the report. If there is no filter button, then there is no filter option for this report. Click on the filter button.
Step 2: A list will be shown on the right-hand side of the screen. You will be able to enter multiple options according to different filter criteria. It is also possible to filter according to more than one criterion at a time.
Step 3: It is possible to filter according to the following criteria (different possibilities per report/settings):
- Cow number: enter the complete cow number for an individual cow to find her easily. You can also enter any combination of numbers to find a group of cows. It will filter for every cow with that combination of numbers in its name.
- Name: if you use names on your farm, you can also search according to cow name, e.g. Botermijn.
If you want to select a sire, enter the name of the sire.
- Robot: enter the robot number to find cows that are linked to or milked by that robot.
- Responder/animal tag ID: enter all (or a combination of) numbers linked to the tag, and the cows that match with this combination will be shown.
- Animal life no.: enter all (or a combination of) numbers for the life number for the animal(s) you wish to filter.
- Group: search in the select group; e.g. 2 x day.
- Location: enter the location where the cows matching the criteria are located, e.g. milking cows or dry – far off.
- Lactation no.: enter the lactation number that match the desired criteria.
- Lactation days: enter the correct amount of lactation days or a number that matches with the lactation days you wish to filter. Example: desired lactation days: to filter 310 – 315 days, enter ‘31’.
- Reproduction status: select the reproduction status of the cow(s) that you want to filter out: all, inseminated, keep open, open cyclic, pregnant, open, never inseminated.
- Last insemination: select the date when the most recent insemination took place.
- Days pregnant: enter the desired number of days pregnant.
- Days to dry off: enter the number of days to dry off.
- Expected calving date: enter the expected/calculated calving date.
- Production status: select in lactation, dry-off or Jung stock.
- Sire code: search for the code of the sire you wish to filter out (i.e. the number used for insemination and studbook).
- Active: if you filter according to this option, it will only show settings that are either active or not active. For example, it will only show active medicines.
- Medicine category: select the medicine category (e.g. antibiotics or hormones).Brand name: if you know the brand name of a medicine, you can sort by brand.
- Disease name: filters according to disease name.
- Advice: X
- Official code: filter by official disease code.
- Disease category: filter by disease type (e.g. udder diseases or reproduction diseases).Number of feed type: enter the right number assigned to the type of feed.
- Feed types: select the type of feed (e.g. concentrate or roughages).
- Dry matter (%): enter the amount of dry matter % to filter out all the feed types that match the criteria.
- Contact type: filter according to contact type (e.g. advisor or semen supplier).
Step 4: Once you have entered the desired criteria, you can click on the X button in the upper right-hand corner of the filter option. This will close the filter options and show the report filtered according to the criteria you have set. If there is a number shown on the filter button, then the filter option is active. The number indicates how many criteria are selected. Next to this, the “Total: XX” area shows how many cows meet the criteria and are shown on the list.
If you want to add further criteria, simply click on the filter option again and add the additional criteria according to which you wish to filter the report.
Step 5: To delete the filter criteria, click again on the filter button. Now click on Clear all. This also clears the filter criteria and displays the whole report. Alternatively, you can enter new criteria for filtering the results.