
With this features it is possible to change settings such as “dosing weight”, “minimum feed height”, “feed pause” and “temporary feed height” for multiple fences at once. This prevents having to click every individual fence to change one of these settings. Now you can select multiple fences where you want to set one and the same “feed pause” or “feed height”.
How?
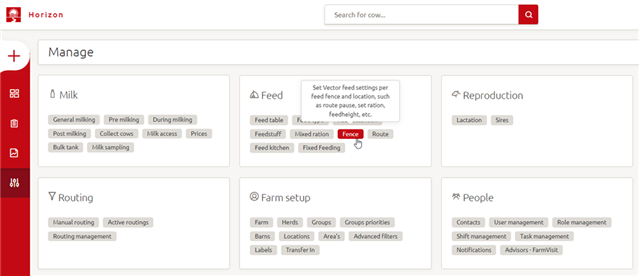
Step 1: Select the option “Manage” in the left navigation pane. Then go to the topic “Feed”
Step 2: Then go to the topic “Feed” and select “fence” (see image 1)
Step 3: You are now on the fence page where fence and location settings are visible. You can also see (image 2) that there is an empty tick box in front of the fences underneath the “Droog – Far off”-location.
Step 4: The boxes which are empty and white can be ticked, this means you are selecting these fences.
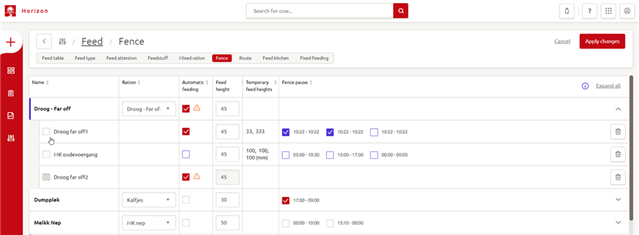
Step 5: When ticking the empty boxes a red tick symbol will appear and a blue bar on top will appear which states “Selected”: 2 fences, Clear and a box stating Edit selected.
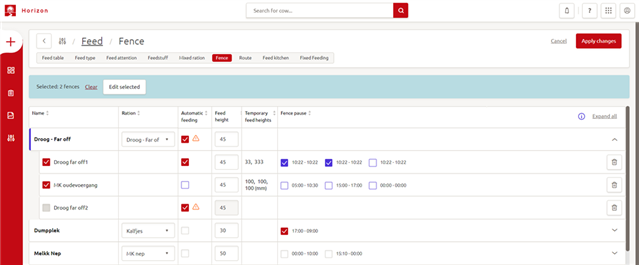
Image 3: Fences “Droog far off1” and “MK oudevoergang” are selected
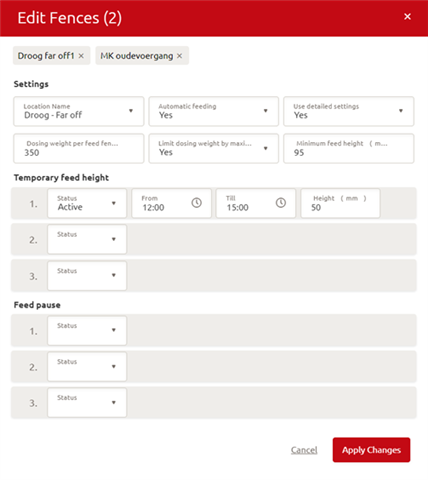
Step 6: When clicking “Clear” the fences will be deselected. When clicking “Edit selected” a window will appear (image 4).
Step 7: In the now-visible window you can select “dosing weight”, “minimum feed height”, three “temporary feed heights” and three “feed pauses” for the fences you selected before.
NOTE: if you choose a location name all selected fences will be changed to this location.
Step 8: By changing one of these settings and clicking on “Apply changes”, this change will be applied to all selected fences.